You can have an awesome site and all the shiny graphics, but if you fail to deliver meaningful content to your readers, it’s over before you’ve even started.
This is where so many bloggers fall short. Their articles aren’t much different than the stuff that they read. Or worse, they write regurgitated content in the form of an underwhelming blog post.
So what makes a successful blog post that makes you money… one that gets readers to stick around?
Quality content.
This is always the most important metric and involves a commitment to a few fundamentals.
What are those fundamentals?
Here you’ll learn how to write a quality blog post that boosts engagement and creates fans by:
- Learning how to find awesome topics to write about
- Using fail-safe templates that make your blogs stand out
- Following simple steps to writing a blog that both people and Google love
Beat your best in these elements each week and you are on your way to building a successful business from blogging.
Let’s dig in!
Step Zero: How to Start Writing a Blog

Before you start writing a blog post, there are a few things you need to know:
- Know your audience and what search terms they’re using.
- Offer value—teach them something they don’t know.
- Put yourself in your audience’s shoes: “What’s in it for me?”
What’s at the foundation of all of these ideas?
Finding a topic that people want to read is the first step when you begin to start writing a blog.
Here’s how to do it.
How to Choose a Topic People Want to Read About (For Free!)
Many new bloggers get turned off by the idea of keyword research and finding great topics to write about, which is usually associated with expensive SEO tools.
But it doesn’t have to be that way!
Here are a few ways to do keyword research without paying a dime.
Free Topic Research Right on Google
Many of the free keyword research tools available are things you use every day.
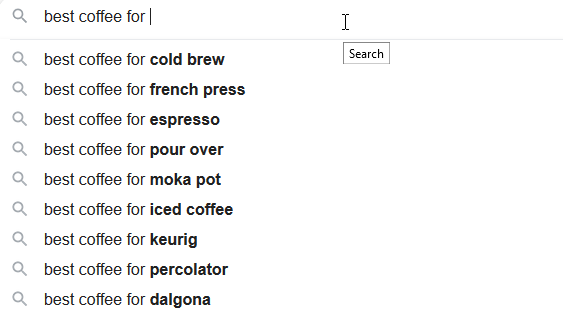
You probably already know what autosuggest is—when you start typing into the search bar on Google.com, it’ll come up with a list of potential searches. Most people use one of these rather than typing out their entire search phrase.
Start typing a topic: “best coffee for” and then let Google do the rest of the work.
Not only does this give you an idea of what people are looking for, but it also presents more detailed keywords. These highly specific, “long-tail” keywords have a low search volume, but a high conversion rate.
Answer the Public
You might get weirded out by the guy on the front page (trust me, you’ll know when you get there), but this site is great if you’re looking for more question-related data.
Content designed to answer specific questions has huge ranking potential. And this tool provides an endless number of specific questions your audience is searching for.
Type in one to two broad keywords for the best results and let it work its magic. Once it’s done processing, you’ll have a visual display of tons of information on what your audience is searching for.
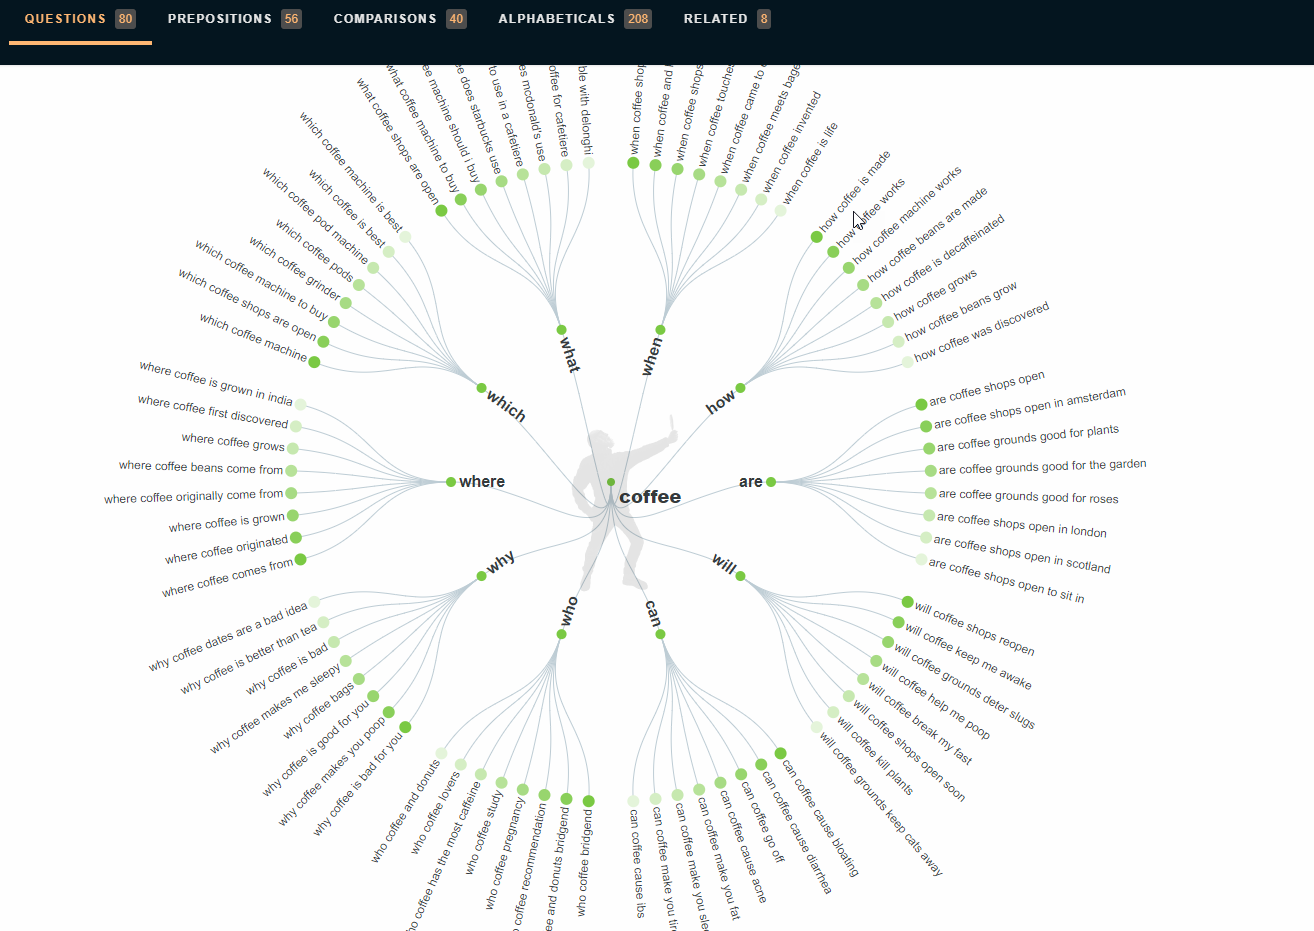
Don’t like the Visualisation option? Just switch to Data for a list of queries.
KWFinder (10-Day Trial)
KWFinder is one part of the Mangools Suite and comes with a 10-day trial. You can search tons of keywords in the 10-day trial. So plan out your research ahead of time!
This helps you find long-tail keywords that have a low ranking so you don’t have to worry about competition.
3 Types of Blog Posts that Hook Your Readers
Once you have a plump list of keywords you want to focus on, you can look at how to plug them into different types of blog post templates.
Having an idea of what kind of blog post you want to write will make it easy to come up with a structure and start writing.
Here are three powerful types of blog posts you can use to improve your writing game.
“How To” Posts
“How to” posts are a great way to attract the DIY crowd while driving traffic to your affiliate links.
The headline of this post automatically implies value—you’re teaching your readers how to do something on their own.
On top of that, you can recommend the best tools or accessories, etc. for the job. Whether that’s high-quality materials, tools that provide shortcuts, or things that just make life easier.
Of course, you’ll only want to include the most relevant tools here—don’t go crazy with affiliate links. Readers are more likely to buy if you don’t overwhelm them with too many things.
“The Best” Posts
You’ve seen this type of post before:
- The Best Travel Mugs to Keep Your Coffee Hot (Looking for well-insulated mugs)
- The Best Coffee Mugs for Dad (Looking for Father’s Day gift ideas)
- 12 Best Travel Coffee Mugs: Insulated, Steel, Thermal (Points for being specific, but still giving readers options!)
Don’t miss out on the key element here!
If you’re writing about the best mug, the best computer, or the best knife…
Remember what your reader is thinking: WIIFM (What’s in it for me?)

Your reader cares about what the best product is. But more importantly, they want to know what the best product is for them and their specific situation.
So rather than just writing posts like “The Best Travel Mugs,” get specific. Write about “The Top 10 Best (Products) for (Specific Use).”
Bonus points if you can include a benefit in the headline, like in the first post I mentioned. Rather than talking about thermal or well-insulated mugs, they’ve provided a clear benefit: it keeps your coffee hot.
These posts are a great place to drop some affiliate links. If you haven’t looked at affiliate programs yet, Amazon Associates is one of the best places to get started.
Listicles
This is a highly effective type of post that you need to write ASAP.
Due to the nature of “list” posts, they’re already easy to read. Your readers can easily look through and jump right to the sections they care about the most.
They’re organized in a way that most readers just love. It’s easy to skim and even easier to digest. (It’s also easy to get caught up in scrolling through these types of posts—looking at you, BuzzFeed.)
But how do you come up with a list that’ll be a hit with your readers?
Answer: Solve their problems.

Better yet, consider writing a post that solves their most common problems. You can use some of the tips we cover in the keyword research section to get some ideas on great topics for lists.
Things like product reviews, productivity tips, and or posts that teach different strategies make great list posts.
Let’s add one more type of blog post that should be in your rotation:
Roundups
If you want to pack even more punch into a list-type post, do a roundup.
A roundup is a list of links that typically links to high-authority sites (or sites in a variety of niches) to help inspire readers, give them ideas, and introduce them to additional resources.
Roundups have insane potential—they’re the types of posts that get shared by both your readers and the people you’ve mentioned in your post.
You could make a roundup of tools from your favorite companies, list the most effective strategies for email marketing, or make a list of statistics on a specific topic.
Here are some great tips on creating roundup posts, including what you need to do after you’ve published it.
How to Write a Blog Post People Love
After you’ve done your keyword research and gathered your audience’s questions, you decided on what type of post you want to write.
Now get writing by following these 7 guidelines!
1. Craft a Compelling Headline
You can have amazing content packed with value that solves all of your readers’ problems, but none of it matters if you can’t get them past the headline.
You want your headline to answer the big question that every reader has:
“WIIFM—What’s In It For Me?” What problem are you solving for them?
Your headline should give your audience a reason to take time out of their day to read your content.
Great headlines not only encourage people to read, they encourage sharing as well. Of course, you’ll want to follow it up with a good blog post that delivers so much value people can’t help but share!
The best headlines:
- Grab your reader’s attention
- Are specific
- Make a promise
- Create a sense of urgency
You’ll want to tie in at least three of these for an effective headline. Specific headlines (especially headlines with numbers) that make a promise and include a powerful benefit do well, as long as you also deliver with your content.
2. Create an Optimized Outline
Want to know one of the worst things about writing?
Staring at a page with nothing on it but a blinking cursor.
Now is the time to use all your keyword research and that list of questions your audience has about your topic to build an epic outline.
Use H2, H3, and H4 headers to break up your content and create your outline. The questions that require a lot more detail and information? Use lots of subheaders to break up that text.

See the size difference?
Your readers benefit from this sort of organization, as it makes your content flow better and further organizes your post.
You don’t want lots of text under just a few headings—it makes it difficult for readers and search engines to follow.
This provides SEO benefits—Google uses information in your headers to analyze how your subtopics fit together. Using different types of headings like this shows Google you’re creating a sort of “sub-conversation” under your headings.
Use Google to Help Outline Your Post
The searches related to section located at the bottom of the search engine results page (SERP) is a great source of information. You probably see this all the time—it’s a gold mine of keywords and phrases hiding right in plain sight.
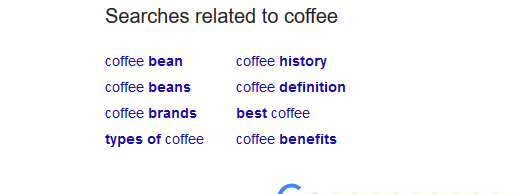
This will help you find more specific information related to your target keyword to include in your blog post.
If you’re wondering how to create quality content, this is a great place to start! Using this as a launching point, you can create quality around these topics, knowing for sure your readers are interested.
The “People also ask” feature is my personal favorite. You’ll notice that after you click on a question, it adds some more to the list.
After about 100 questions, depending on your niche, it starts to get pretty irrelevant. But jot down 10-20 highly relevant questions from this list and you’re good to go!
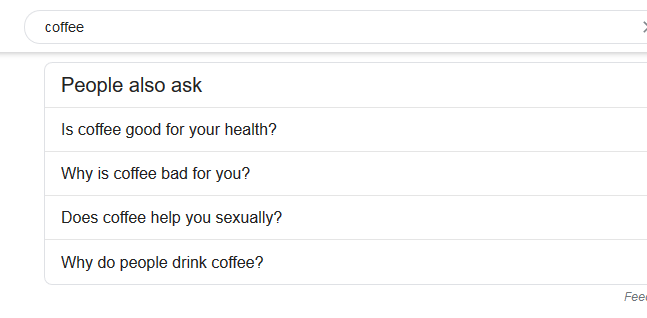
What better way to drive traffic to your site than by answering your audience’s questions?
You can use some of the questions listed in this section as headers in your article.
Rule of thumb: Does anything you find in either of these sections on the SERP require more than 1,400 words to properly answer? Add it to your idea list for upcoming blog posts.
If you can answer it in about 200 words, and it is relevant to your main topic, include it in your article.
3. Use Short, Easily Readable Paragraphs
No one wants to read giant blocks of text.
It’s difficult to read, impossible to scan, and just doesn’t look appealing, especially for mobile readers!.
Readers usually scan content before they read it. Today’s online world is flooded with content—they need a way to scan the topics you’re covering and decide if your content is worth their time.
And while a paragraph with five lines of text looks okay on a desktop, that one little paragraph takes up most of their screen if they’re reading on their phone.
4. Add Bucket Brigades
What the heck are bucket brigades?
You’ve probably heard of bucket brigades in regards to assembly lines and firefighters—water buckets (or a bit more recently, assembly items) are passed down the line of people.
But how does this relate to writing a blog post?
Bucket brigades are short, attention-grabbing phrases that guide readers from one line to the next.
Like this:

You’ve probably seen a few of them in this blog post you’re reading now.
5. Use Bolds and Italics
Use bolds and italics throughout your blog post.
It makes it much easier for scanners to get the gist of your post!
Bold phrases you want to draw attention to and italicize words and phrases for emphasis. This highlights the most important parts of your content, letting readers take note of what they need to remember most.
You don’t want to overdo it—otherwise, formatting loses its impact.
6. Use Ordered and Unordered Lists

Use a combination of ordered and unordered lists in your posts.
In general, you’ll want to use unordered lists unless your list is leading into a “step-by-step” section or it’s necessary to list things in order of importance.
You can use lists:
- After your intro, to give an overview of your post (You can even turn this into an index)
- At the beginning of a longer section with lots of subheadings
- When you’re giving a list of ideas or resources
- At the end of the post to summarize the post or provide the next steps
Having lists can bring more organization to a post and make it much easier to read.
It can also make writing them easier, helping you organize your ideas for longer content.
7. Write a Short, Compelling Intro Last
It’s almost always easier to write your intro last.
As you write your content, you’ll get ideas for what to include in your intro.
Writing your intro last also makes sure it fits your content. Sometimes we add or remove things at the last minute, potentially changing the way our intro works.
Saving this part for last will save a lot of time and give you time to get a little more inspiration. Second only to your headline, intros are critical to making sure your readers don’t bounce.
Not sure what a good intro looks like? This post on SEO copywriting is a great example.
The Next 5 Blog Posts You Need to Write

- An introduction to your blog
- 2 how-to articles
- 1 roundup post
- 1 “The Best ______ for ______ ” post
Your first blog post should be the introduction. You can repurpose this and use it as inspiration for your “about” page.
Maybe you’ve already done this. Your blog is up and running and you have a lot of content, but you’re not getting a lot of traffic.
Do another intro.
Say something like, “I have a lot of new readers, and just wanted to introduce myself again.” People do this all the time! And it’s a great way to engage with new readers!
The next posts can be things from the list above in any order. You might want to save the roundup for last… after you have a few more posts and a clear idea of what direction you’re going.
The most important thing to do is this: get started!
Rinse and Repeat!
Knock these out in the next 30 days, and then just rinse and repeat. You’ll be on your way to your first (or another) 100 blog posts in no time!
Use the same process to write each post. Every keyword research you do will provide a list of topics you can work from for new posts. Just keep following this process and you will see your traffic and fans increase!
Let’s Review!
It’s hard to get started and sometimes it’s hard to keep going. But learning these essential elements in how to write a blog post will be the key to your blogging success!
Let’s review the process:
- Find awesome topics to write about
- Use fail-safe templates to organize your posts
- Write an awesome blog post that your readers will love
- Write these posts first
- Do it all again!
Once you start writing on a regular basis, it only gets easier as you develop a more efficient content creation process. Just start writing!

